Sunday, February 9, 2014

Wakulla Springs State Park

About a week ago, we went to Wakulla Springs State Park with my parents and another couple for the day. We have been here once before, when we visited Florida a few years ago on vacation. Wakulla Springs is home to one of the largest and deepest freshwater springs in the world. Both times we have visited the park in the winter and we hope to visit again when it's summer to see the changes along the river and forest.

On the guided boat tour, we were not disappointed. We viewed a wide range of ducks, birds, turtles, fish, alligators and manatees. It is amazing to see such a sanctuary for wildlife up-close. Manatees are only around in the winter here, to take advantage of the warm spring water during the winter. Alligators are not as common around the beach, but here (inland Florida), it is hard not to spot one along the river.

Here is a collection of the sights of the day:


Alligator having a staring contest with flock of vultures


Manatees, the log-like shapes under the water, chilling by the spring.

The biggest gator of the day!

 After our boat tour and lunch, Zachary and I went on a short hike in the woods in the park.


Cypress knees


Duh! Don't have to tell me twice.

Moody Blues

Ta-da! Rainstorm! Can you feel the rain on your face in the kitchen? We can, and that is okay with us!

I think our kitchen gaining an eclectic vibe to it, with the contrasting colors, finishes and styles. I am still not certain how it will tie together in the end when finished.

This kitchen is nothing like what I had in mind originally, but through the months of editing and re-editing our plan on the fly, we are enjoying this quirky second cousin of a kitchen.

We are nearing the finish line with our dear kitchen. Feels good.

  • Order and install foam ceiling tiles
  • Design, build and install backlit stained glass above cabinetry
  • Finish a couple spots of stain and polythane
  • Trim around ceiling and skylights
  • Seal backsplash
  • Find some stools for the island (the ones pictured are on-loan from the garage workbench)
  • Install pot-filler faucet over cooktop
  • Misc decorative touches

Wednesday, January 22, 2014

Sunday Renewal

Needing to renew our Florida State Park annual pass for 2014, we went to our local state park, St. Andrews, and went for a reviving beach walk while we were there. Felt nice to get away from the computer, sawdust and paint fumes for a couple hours.


Sunday, January 12, 2014

Cabinet Heartache

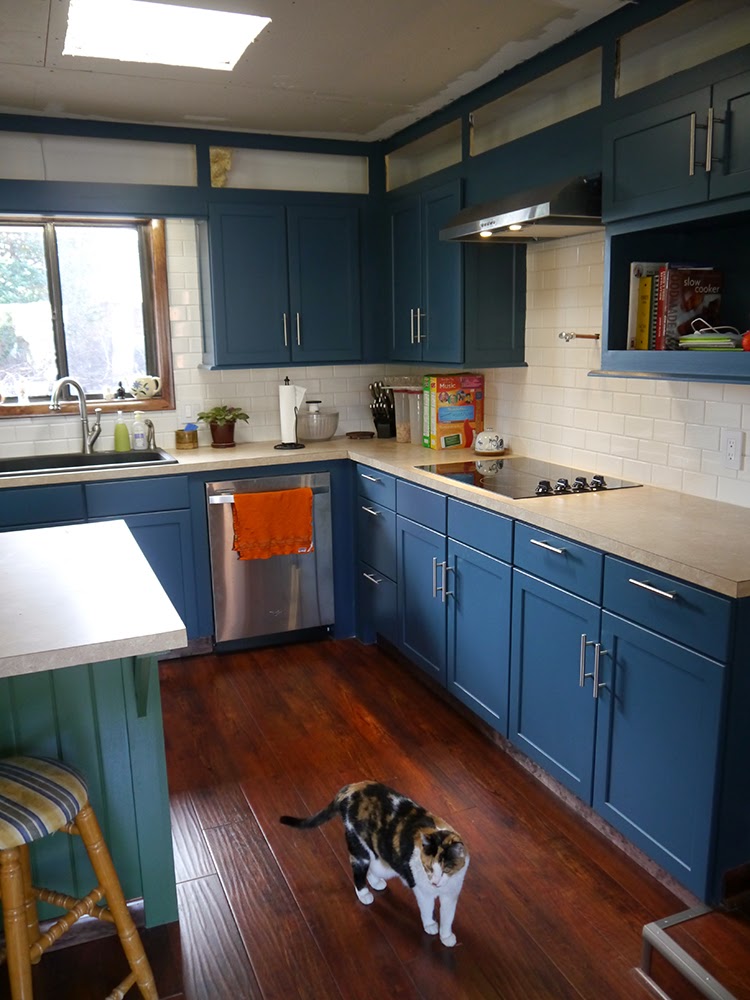
She thinks any open cabinet door is a portal to Narnia
What I said last post being a relief we found a stain color that matched the existing cabinets, I take it back. We found a stain that matches the color and finish to the existing very nicely, but it quickly went down hill from there.

It was a stain that had the finish mixed in with it, so you don't need a polyurethane coat afterwards. We didn't really care for that attribute, but it matched so well, we gave it a try. To match the intensity of the color to the existing, we needed to do 3-4 coats. Okay fine, that is expected. The application guide called for brush only application.


The coats begin. The first coat went on uneven and the brushstrokes were very visible. We figured it would get better with additional coats. The color evened out as the coats when on, but the brushstroke marks got more exaggerated with each application, making it rough compared to the existing cabinetry. We tried sanding between coats to smooth things out, but as soon as the next coat went on, back to square one. When sanding a section with the final amount of coats on it, after sanding, the finish was uneven. From a distance it looked alright, but up close it looked terrible. We tested going over the existing parts with stain, but it wouldn't stick and just streak. This stain didn't behave like normal stain, it had a very sticky consistency, probably due to the polyurethane already mixed.


Disgruntled with the mess we had, the primer came out. We painted a section of the cabinets with white primer and looked to each other, okay now what? We have a blank canvas in front of us. First thought was a dark brown to mimic what we had. Most likely an over-reaction to the midnight stain heartbreak, we chose an entirely different color in the kitchen. Remember my comment about the color collision in the kitchen, it could bear one more... (paint fumes and late nights can alter one's judgement)


Blue! We picked a stormy blue from the pantone book and picked up a can at Lowe's. I saw a kitchen redo a few minutes earlier in a blog that inspired the blue choice.


Cracked open the can, and painted one door and one panel. Hmmm... Maybe it will dry darker. *Waits a few hours, paints primer on rest of the cabinets.*  Examines the blue again. Crap.

After admitting to each other we don't like it, we go back to the store for another gallon of paint. Blue is still the object of our affection, but to find the right blue.  (We actually like the color itself a lot, just not there, on cabinetry. We will find use for it in a future project)


Zachary cracks open a new gallon of paint.


Rain Storm is its name, and yes, we had a rainstorm yesterday.


The panel test...


Will it be liked or won't it?? Stay tuned for the next episode of As The Paint Dries!

Sunday, January 5, 2014

Island


We have a green island now, to add the collision of color of what is the kitchen and living room. I have always liked the idea of an island in a kitchen being different from the normal cabinetry. We added a post from the ceiling to give the island a power outlet. Running electrical from under the floor really wasn't an option, as the house sits on a concrete slab.


The post is growing on me anyway, it gives a little more dimension to the space. Also in the past few days, Zachary has been adding on to the pre-fab cabinets, to give them a custom look. Space above cabinets is always a pickle, whether to leave it open, make more storage, raise the cabinets, or whatever. We don't have a need for additional storage, and it would be hard to reach anyway. We do have an idea for some decorative lighted panels, using xmas lights and stained glass for that space. Once Zachary has the new framing and trim complete around the cabinets, we will start the staining of the new wood, to match the existing. We found a stain that matches the pre-fab cabinets, so that is a relief.

Malevolent Quee
Queequeg, of course, is always in the middle of the action. Most of the loud construction noise and action doesn't bother her. Diogenes will hide at a sound of a sneeze.

Bird!

Friday, January 3, 2014

Doubling Back

Happy New Year Everyone!

After our closet project in the house, we made a u-turn and went back to the kitchen and living room. The windows needed to be trimmed out still, along with doing baseboards, crown molding, etc. That required a lot of coats of stain and polyurethane.

Seeing the windows, etc without trim was starting to drive us crazy, so we decided to double back on the living room and kitchen before continuing on in the house.

Gluing laminate to the counter
Our oven arrived in mid December, so that allowed Zachary to continue on with the trim and cabinet additions in the kitchen. And a good excuse to build us an island for the kitchen.

We held off on putting in an island right away, as we wanted to live in the space a bit and decide what we really needed for storage & utility.


Preview of the island color. Hint: it doesn't match the other cabinets, on purpose!